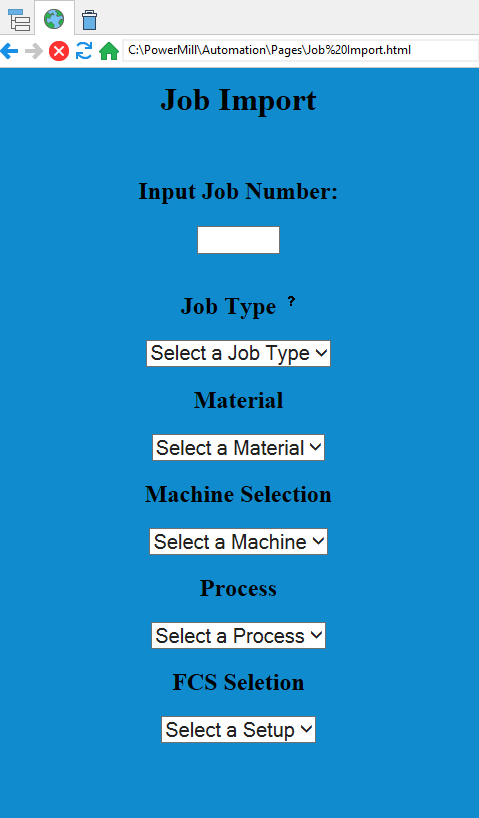
Hey guys, I just wanted to start a thread here about a custom UI I’ve been developing over the past few years.
Unfortunately I haven’t been able to quite figure out how to make plugins correctly, so I’ve resorted to rebuilding the PowerMill interface to suit what I need.
The concept is quite simple.
Step 1: Generate an HTML page that is compatible with PowerMill’s native web browser (HTML 3 i believe)
This can be done using FILE commands to generate a fresh page whenever you need.
Personally I call this using a Master Switchboard script (a script in which I house my CALL methods using patterns as my identifiers) but you can call this however you want.
Example Script:
RESET LOCALVARS

        // Create HomePage Website

        STRING fileName = "Main Page.html"

        STRING directory = "C:\PowerMill\Automation\Pages"

        STRING browserCall = $directory + "\" + $fileName

        IF dir_exists($directory) {
            CD $directory
        } else {
            MKDIR $directory
            CD $directory
        }

        if file_exists($fileName) {

            DELETE FILE $fileName

        }

        FILE OPEN $fileName FOR WRITE AS output

        STRING line = '<!DOCTYPE html>'
        FILE WRITE $line TO output
        $line = '<html>'
        FILE WRITE $line TO output
        $line = '<head>'
        FILE WRITE $line TO output
        $line = '<title>Your PowerMill Homepage</title>'
        FILE WRITE $line TO output
        $line = '<style>'
        FILE WRITE $line TO output
        $line = 'body {'
        FILE WRITE $line TO output
        $line = 'background-color: #108bce;'
        FILE WRITE $line TO output
        $line = '}'
        FILE WRITE $line TO output
        $line = '.container {'
        FILE WRITE $line TO output
        $line = 'display: flex;'
        FILE WRITE $line TO output
        $line = 'flex-direction: column;'
        FILE WRITE $line TO output
        $line = 'align-content: center;'
        FILE WRITE $line TO output
        $line = 'align-items: center;'
        FILE WRITE $line TO output
        $line = '}'
        FILE WRITE $line TO output
        $line = '.button-row {'
        FILE WRITE $line TO output
        $line = 'display: flex;'
        FILE WRITE $line TO output
        $line = 'flex-direction: row;'
        FILE WRITE $line TO output
        $line = '}'
        FILE WRITE $line TO output
        $line = '.button-column {'
        FILE WRITE $line TO output
        $line = 'display: flex;'
        FILE WRITE $line TO output
        $line = 'flex-direction: column;'
        FILE WRITE $line TO output
        $line = 'margin-right: 30px;'
        FILE WRITE $line TO output
        $line = 'margin-left: 30px;'
        FILE WRITE $line TO output
        $line = 'align-items: center;'
        FILE WRITE $line TO output
        $line = 'justify-content: center;'
        FILE WRITE $line TO output
        $line = '}'
        FILE WRITE $line TO output
        $line = '.mainpara {'
        FILE WRITE $line TO output
        $line = 'text-align: center;'
        FILE WRITE $line TO output
        $line = '}'
        FILE WRITE $line TO output
        $line = '.button {'
        FILE WRITE $line TO output
        $line = 'display: flex;'
        FILE WRITE $line TO output
        $line = 'align-items: center;'
        FILE WRITE $line TO output
        $line = 'justify-content: center;'
        FILE WRITE $line TO output
        $line = 'background-color: #EDF2F4;'
        FILE WRITE $line TO output
        $line = 'color: #0C1141;'
        FILE WRITE $line TO output
        $line = 'font-size: 20px;'
        FILE WRITE $line TO output
        $line = 'font-weight: bold;'
        FILE WRITE $line TO output
        $line = 'text-align: center;'
        FILE WRITE $line TO output
        $line = 'width: 300px;'
        FILE WRITE $line TO output
        $line = 'height: 50px;'
        FILE WRITE $line TO output
        $line = 'border-radius: 25px;'
        FILE WRITE $line TO output
        $line = 'margin-bottom: 10px;'
        FILE WRITE $line TO output
        $line = 'cursor: pointer;'
        FILE WRITE $line TO output
        $line = '}'
        FILE WRITE $line TO output
        $line = '.hubstart {'
        FILE WRITE $line TO output
        $line = 'width: 145px;'
        FILE WRITE $line TO output
        $line = 'margin-right: 5px;'
        FILE WRITE $line TO output
        $line = '}'
        FILE WRITE $line TO output
        $line = '.hubcall {'
        FILE WRITE $line TO output
        $line = 'width: 145px;'
        FILE WRITE $line TO output
        $line = 'margin-left: 5px;'
        FILE WRITE $line TO output
        $line = '}'
        FILE WRITE $line TO output
        $line = '.footer {'
        FILE WRITE $line TO output
        $line = 'position: fixed;'
        FILE WRITE $line TO output
        $line = 'text-align: center;'
        FILE WRITE $line TO output
        $line = 'bottom: 0px;'
        FILE WRITE $line TO output
        $line = 'width: 100%;'
        FILE WRITE $line TO output
        $line = '}'
        FILE WRITE $line TO output
        $line = '.logo {'
        FILE WRITE $line TO output
        $line = 'width: 300px;'
        FILE WRITE $line TO output
        $line = 'height: 100px;'
        FILE WRITE $line TO output
        $line = '}'
        FILE WRITE $line TO output
        $line = '</style>'
        FILE WRITE $line TO output
        $line = '<script>'
        FILE WRITE $line TO output
        $line = '</script>'
        FILE WRITE $line TO output
        $line = '</head>'
        FILE WRITE $line TO output
        $line = '<body>'
        FILE WRITE $line TO output
        $line = '<div class="container">'
        FILE WRITE $line TO output
        $line = '<img src="Custom Logo URL Here" class="logo">'
        FILE WRITE $line TO output
        $line = '<h1>Powermill Homepage</h1>'
        FILE WRITE $line TO output
        $line = '<BR><BR><BR><BR>'
        FILE WRITE $line TO output
        $line = '</div>'
        FILE WRITE $line TO output
        $line = '<div class="container">'
        FILE WRITE $line TO output
        $line = '<div class="button-column">'
        FILE WRITE $line TO output
        $line = '<div class="button-column">'
        FILE WRITE $line TO output
        $line = '<button class="button" onclick="">Start Up</button>'
        FILE WRITE $line TO output
        $line = '<button class="button" onclick="">Open Existing</button>'
        FILE WRITE $line TO output
        $line = '<button class="button" onclick="">Automation Processes</button>'
        FILE WRITE $line TO output
        $line = '<button class="button" onclick="">Help and Training</button>'
        FILE WRITE $line TO output
        $line = '</div>'
        FILE WRITE $line TO output
        $line = '</div>'
        FILE WRITE $line TO output
        $line = '</div>'
        FILE WRITE $line TO output
        $line = '</body>'
        FILE WRITE $line TO output
        $line = '</html>'
        FILE WRITE $line TO output

        FILE CLOSE output

        VIEW BROWSER_WIDTH "500"

        BROWSER GO $browserCall
Step 2: Once generated you can use the inside the HTML to execute PowerMill commands via the window.external.Execute() function from javascript.
This will allow custom methods or macros to be ran from within the HTML.
Myself, I have the functions inside the javascript generate patterns and then call the Master Switchboard script which then does a CALL method to my Master Function script (the main macro that houses all my macros and automation routines)
Honestly, I find this method pretty sleek and relatively easier to use for those who aren’t super savvy with coding. It’s an easy method to teach as well.
While I have been successful in create one off plugins, I haven’t been able to generate a Master Plugin that houses all my automation, where as this method can still run everything I’ve created over the years, and is quite easy to modify when adding additional modules and components to the existing macros and routines.
Hopefully this helps out a bit, or at least inspires someone to get a little more creative with the PowerMill UI.
Thanks
- Jarryd